
About Splicing audio cables, Splicing them together is a great option if you need longer lengths of cable for your audio setup. To the average listener, there should be no audible difference if done properly. However, if you execute it improperly, it might cause audio interruptions and even circuit meltdowns.
Luckily, the professional splice is simple to do. For that, you will need some basic gear and equipment that you might already have lying around the house are all you need to splice. Let’s dig into more about it more.
Table of Contents
- How Does Splicing Speaker Wire Work?
- What do you need to do for Splicing?
- 5 ways to splice audio cables
- Splicing Audio Cables: Does Splicing Speaker Wire Reduce the Overall Quality?
- Conclusion
How Does Splicing Speaker Wire Work?
In reality, splicing is very simple. And when you join the cores of two wires, the electric signals can travel freely along the entire cable. Moreover, the quality of the sound does not get affected as well.
You can get this done in several ways. So, choose what works according to your situation. As long as standard procedures for splices are followed, any of them can produce a reliable connection.
Hence, do the splicing using these basic techniques
- Soldering Technique
- Crimping Method
- Wire Nut Technique
It’s worth mentioning that soldering the connection lasts for decades, even though any of these procedures will provide a satisfactory splice. Soldering, on the other hand, takes the most time because not everyone has a soldering iron or knows how to use one.
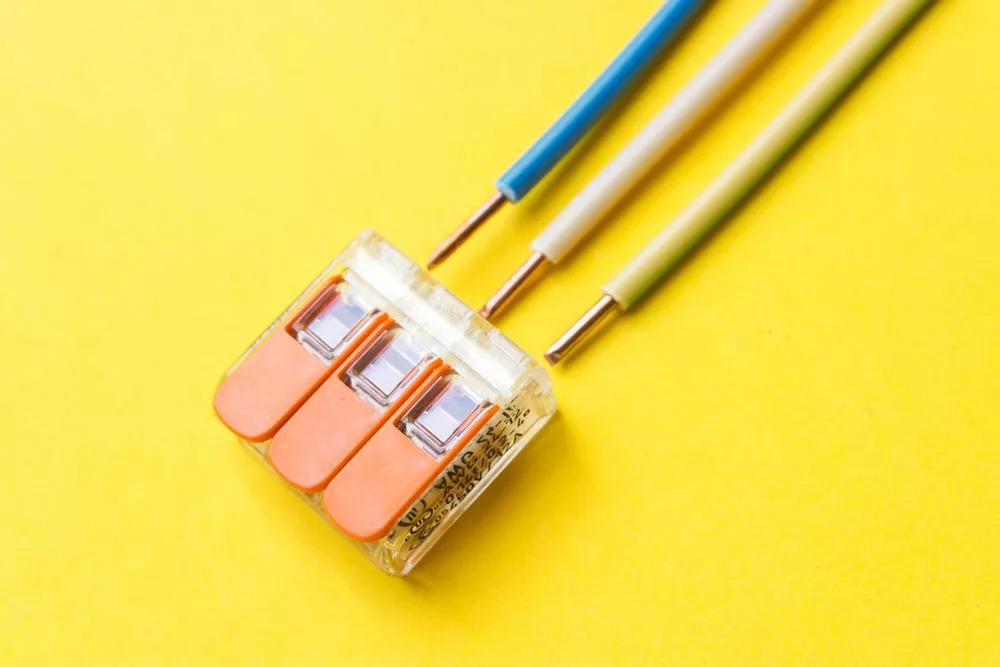
Caption: Bare copper wires with connectors
What do you need to do for Splicing?
Getting started with splicing requires some work beforehand. For that, take care of the following factors for a successful splice.
Properly Place Speakers and Equipment
Before splicing, you should always check that your speakers and other gadgets are in the proper setup. Start with putting the stereo receiver on or off mode, and unplugging its power supply is standard procedure. Also, disconnect all the speaker wires and check if there is any damage before you store them away. If you think that any wire is broken, discard it.
At this point, relocation of the speakers is easier than before. Also, now is a good time to decide how to conceal the speaker wire in your home. With the help of experts, you can hide the wires away in a manner pleasing to the eyes.
Measure Distance and Cut
Once you know where to put your speakers, you can calculate how much wire you’ll need to hook them up to your stereo. For that, you will use a measuring tape and measure the distance.
Using a notepad, write the measurements, including the speaker positions. After you are done, check the speaker wire lengths against your notes. In addition, make sure the cables have the correct gauge size.
Then, you can use the remaining cable and attach it to an unlabeled speaker. Check the length you need and cut it from the speaker wire spool. Cut extra so that you have a good length to work with. Label the wires and repeat the process for other equipment.
Strip the Wire
Next, you need to strip the wire so that you have a conductor to put the splice on. For that, put the terminals of wires you want to splice together while putting the same polarity next to each other, i.e., positive-to-positive, negative-to-negative, etc. Strip the outer insulation off with the wire cutters, leaving a quarter of an inch of bare conductive material at each end. You’ll have an inch of space between the output terminals of the individual wires.
Caption: Wires spliced with connectors
5 ways to splice audio cables
You can get this done in several ways, so picking one is entirely up to your requirements. As long as you follow the standard procedures for splices, any of them can produce a reliable connection.
Twist and tape
The best way to do this is to twist the two cable wires with each other and cover them with insulation tape. However, it’s the least reliable strategy, so you shouldn’t depend on it. Moreover, the splice will break if you stretch the wires even a little.
The adhesive on electrical tape, usually the cheap variety, tends to loosen up after some time. The tape can deteriorate quickly in places like attics or cars, where heat and humidity are constantly shifting. Hence, always use the highest quality 3M electrical tape, which you can find for $3 per roll at the hardware store if twisting and taping are necessary. It stays tight over time, at least inside.
Splicing Audio Cables: Twist-on wire nuts
Wire nuts work best for use with solid wire. Besides, they’re the top pick when joining solid and stranded wires. Connecting two-strand wires is where wire nuts tend to fall short. Also, you can use wire nuts if you’re cautious, but other crimping tools or techniques are preferable.
Good connections with wire nuts depend on using the right nut for the wire gauge. Also, if you are splicing more than one wire with the same or different gauge, you’ll want to upgrade to a larger wire nut. Usually, red nuts are recommended for 12-gauge wires, yellow for 14-gauge wires, orange for 16-gauge, etc.
As we told you before, nuts work best with solid wires. It’s because the nuts “bite” into the coiled metal insert and hold on to it, making the connection stable. In case you have stranded wires, wire nut threading action might affect these. Thus, it would be best to be careful while utilizing this option.
Splicing Audio Cables: Crimped closed-end caps or sleeves
Just like wire nuts, you can use crimp caps, or pig-tail sleeves, as they have a certain size appropriate to the wire gauge you are using (although it doesn’t have color coding). Moreover, like other splicing connectors, you shouldn’t remove the wire insulation so much that bare wire goes over the sleeve’s base.
To properly secure crimped caps, you can use a crimping tool. Some good crimpers with a ratchet mechanism exist on the market that you can buy for ten to fifteen bucks. Thus, you can crimp stranded wire with these crimpers because they also incorporate an insulation stripper most of the time.
Splicing Audio Cables: Insulated butt connectors
These in-line connectors, or “butt splices,” are crimped and consist of a metal tube housed in a plastic sleeve. Yellow ones are for 10-12 gauge wire, blue ones are for 14-16 gauge., and red or pink ones are for 18-20 gauge. Like wire nuts, there are precise and color-coded sizes for various wire gauges.
Butt splices are preferred above other types of splices because of their sleek and aesthetically pleasing appearance.
There should be enough insulation removal so the bare wire can sit flush in the metal tube. To create the butt splice, you will place the crimps between the center and the end. For proper connection, the crimp must “bite” the metal tube inside, not the insulation.
Butt splices, like crimped sleeves, require a thorough and firm crimp with the right-sized jaw and a pull test to ensure reliability. If done properly, a butt splice is as durable as crimping sleeves and doesn’t need tape.
Splicing Audio Cables: Soldering
Soldering is the most reliable splicing process but is also the most time-consuming and costly. Because a properly soldered splice is just as durable as the wire, it can be useful in some situations. However, it calls for more expertise than crimping or wire-nut splices and uses specialized equipment, like a good soldering iron.
It’s important to remember that the flux residue on the connection from soldering might corrode over time, causing the wire to deteriorate and the connection to break. This, however, is more of an issue with the wire that is a large gauge (22 gauge or larger) than with a very small gauge.
Soldering doesn’t come with insulation for the splice contact like other options. Hence, these connections need insulation after you are done with the process. For that, eat shrink tubes since they are the most reliable, long-lasting, and efficient insulators.
Splicing Audio Cables: Does Splicing Speaker Wire Reduce the Overall Quality?
Yes, in a nutshell. However, this is normally only a problem while working with extremely long wire runs. Mostly, a speaker cable run of fewer than one hundred feet usually will not be an issue. As you exceed this length, quality drops, and interference becomes more prominent.
Thus, it would be best if you used a larger gauge wire in these scenarios. For lengths up to 100 feet, the standard 16-gauge wire should be sufficient. However, 14 or 12-gauge wire will be needed for any length greater than 100 feet.

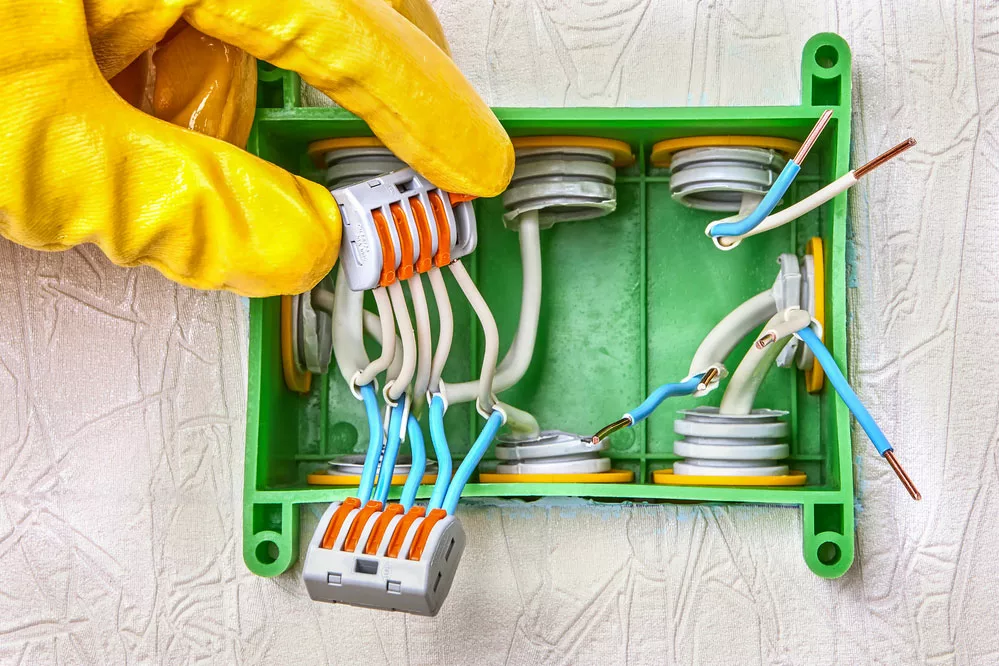
Caption: Spliced wires inside an engine
Conclusion
There are many ways to consider while going for a splice. Experts have to weigh all the possibilities and then work out the selection of technique for the splice. Here at Cloom, we offer wiring harness solutions so that you don’t have to worry about perfection.