
The original Nintendo Entertainment System (NES RF Cables) is one of the most iconic consoles in the history of gaming. Without it, we probably would not have modern game systems such as the PlayStation 5 or Nintendo Switch.
Nevertheless, revisiting older systems can be fun. Games were much simpler and most of them required less commitment than games today.
This may inspire you to dust off your old NES console and connect it to a modern HD or 4K TV. But how? Can an NES console even interface with a flat-screen TV? The answer is yes.
In this guide, we will show you how you can connect your old NES console to your TV using an RF cable.
Table of Contents
How to Connect Your NES console To a Smart TV using an RF Cable?
Understanding the Nintendo Entertainment System (NES)
The problem with most modern TVs, particularly smart TVs, is that they often lack the right input to interface with older gaming systems. However, before we talk about connecting your old 64-bit console to a modern TV, we need to inspect the NES’s outer shell. This will help us find clues as to how to interface it with a smart TV.
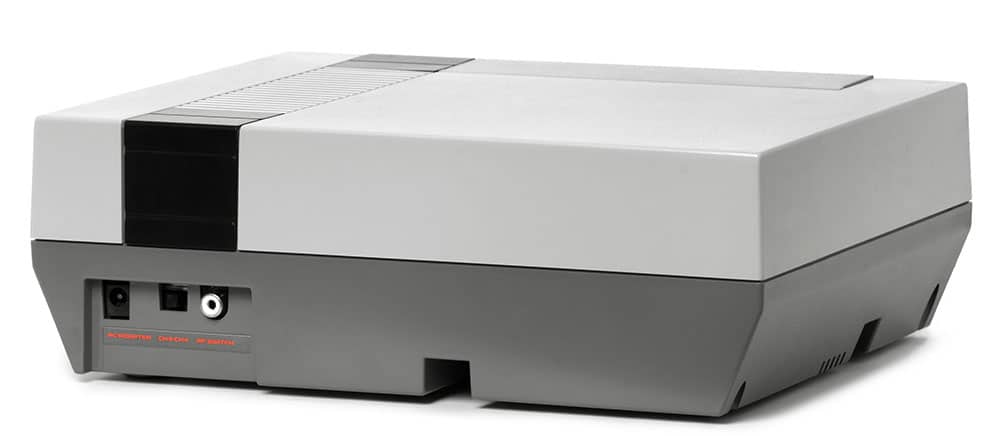
RF OUT
On the NES console, the RF Out or RF switch is a white round port that accepts a standard ¼” male coaxial connection. You can find the RF Out port on the right side of the CH3-CH4 switch. Unfortunately, most modern TVs will not accept a male-to-female RF cable. Thus, we will need to use an RF converter box. There will be more information on this further down in this guide.
NES RF Cables: NES Switch CH3-CH4
You can find the switch between the AC adapter port and RF Switch. We use it to determine which channel the NES console’s output will appear. You can switch between channel 3 and channel 4. Try to ensure that you are using a channel with no broadcast or a local TV channel. This will in turn ensure the least amount of interference as possible.
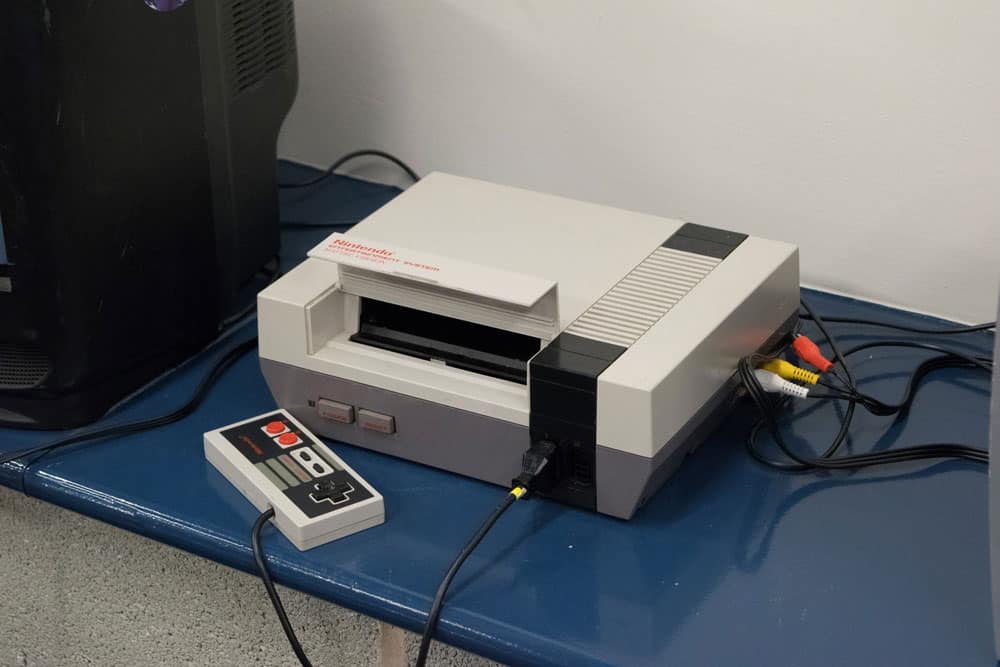
RCA AV OUT
The Nintendo Entertainment System uses these ports for composite audio-visual signals. If your TV has AV capabilities, you can use these ports instead of using the RF out port. The NES commonly comes with a red and yellow port. Red is for audio and yellow is for video.
To ensure that your TV plays sound from both speakers, you must connect the red (or white) cable to the white port on your TV.
AC Adaptor
This port is nothing special. It connects your NES console to a power supply. The NES uses a specialized NES-002 PSU AC unit.
In addition to the above ports, the NES also has two ports for your controllers, as well as a power and a reset button. Now that we understand the basic input/output structure of an NES console, we can move on to discussing how to connect one to your modern TV.
NES RF Cables: Connecting Your NES Console to a Modern TV
As you might be able to surmise, there are two ways to connect your NES console to a modern or smart TV. You can do it either through the RF cable or RCA cable.
RF Cable Connection
To successfully execute the following instructions, you will need to ensure you have an RF to the coaxial connector. However, we suggest you use a 3-in-1 Universal RF Unit for your NES. If you have an antenna connected to your TV, the RF box will allow you to connect both your antenna and NES console to your TV.
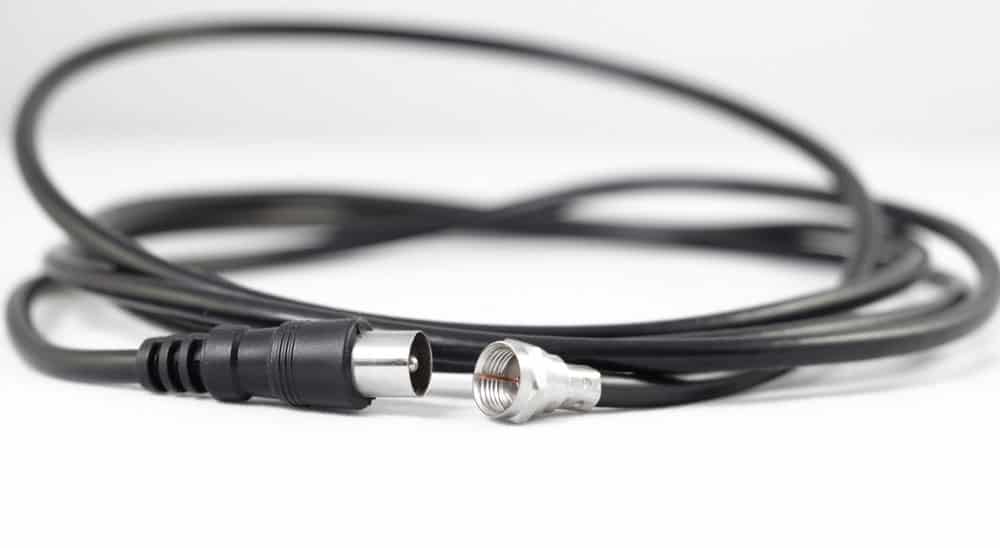
- Screw on the coaxial side of the cable/3-in-1 Universal RF Unit into your TV. If your TV uses an old-fashioned RF port, you will need to get an adaptor or an old-fashioned RF cable.
- If you have an antenna and you are using an RF Unit, plug or screw the antenna cable into the antenna side of the RF Unit.
- Connect the RF cable/ remaining side of your RF Unit to the RF switch on your NES console.
- Use the CH3-CH4 switch to select the desired channel.
- Connect the NES power supply adapter to the NES console and a wall socket.
- Turn the console on and then tune your TV to the channel you selected in step 4.
NES RF Cables: RCA Composite Cable Connection
For these instructions, you will need to have a standard RCA composite cable. You will usually find them in the form of three cables with six connections. If you can find one with two (red and yellow), that is even better.
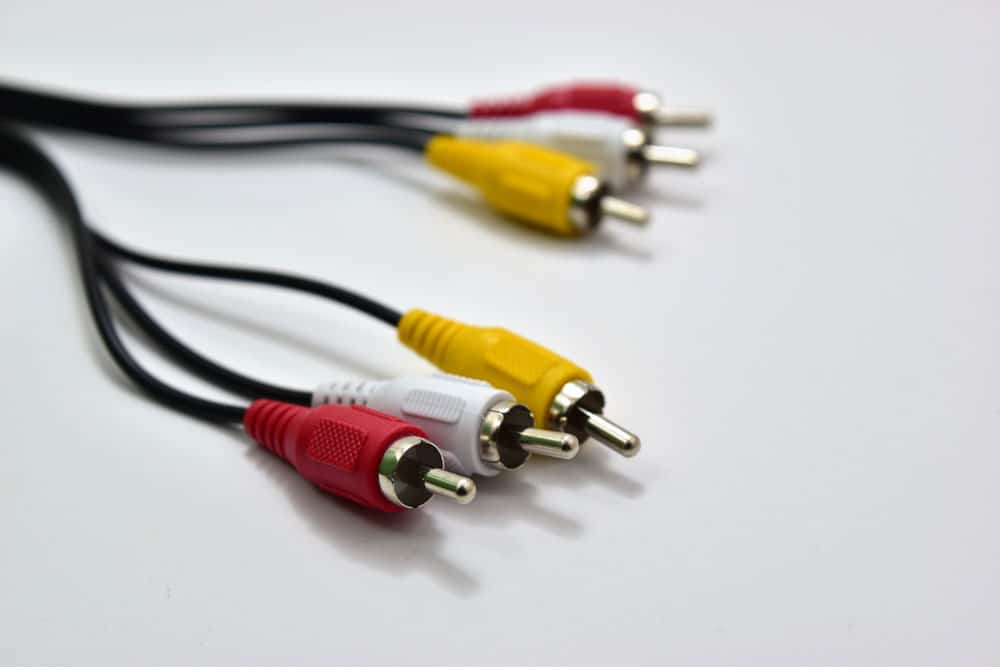
- Connect the composite cable to your NES console. Red-to-red and yellow-to-yellow.
- Connect the other end of the composite cables to the TV. Red-to-white and yellow-to-yellow. This will allow the NES to play audio from both speakers. You will likely have multiple AV options. Choose whichever option suits you the best.
- Plug the NES console into its power supply.
- Turn the console on and set your TV onto the right video source.
NES RF Cables: RCA to HDMI Adaptors
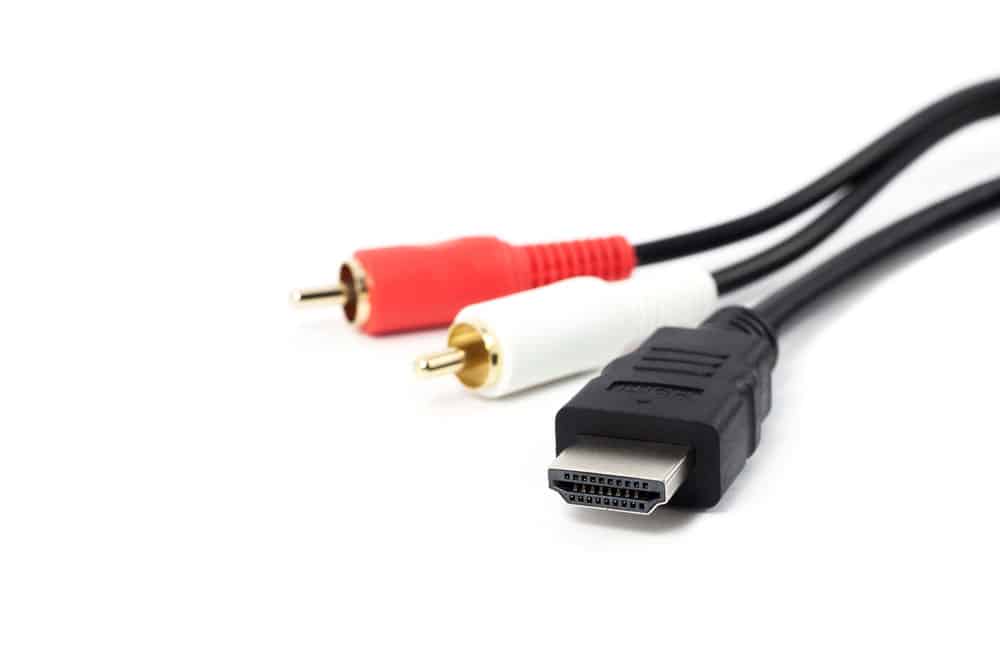
If you find that your TV does not have AV functionality or space for a composite cable, you can purchase an RCA to HDMI cable or adaptor. Most of them are extremely accessible and affordable.
Conclusion
In the above guide, we explored how you can connect your classic NES game console to a modern television screen. If you need any help with cabling or cable assemblies, please do not hesitate to contact us. Nevertheless, we hope that you have enjoyed reading this guide. As always, thank you for reading.