
Every function in the car is controlled in some way by a switch. Rocker switches are popular in various systems for their ease of use. They turn off when the button is released or the timer turns off automatically, and they don’t require the same attention as other switches, such as toggle switches. Rocker switches are used in some models, such as power door lock switches, heated seat switches, rear window defogger grilles, and power window controls. Also, wiring or mounting in any automotive application can be the difference between a pleasant outdoor experience. Making sure your vehicle is wired correctly can save you from getting stranded in the middle of nowhere or shaking off your campsite with a hot beer in the fridge. This post will discuss how to wire a rocker switch correctly so you can feel confident in your 12v setup.
Table of Contents
- What are rocker switches?
- Types of Rocker Switch
- Types of illumination of Lighted/illuminated rocker switches
- How to Choose a Rocker switch: AC or DC Circuit?
- Rocker Switch Terminals
- Rocker Switch Wiring and Connection Diagram
- Conclusion
What are rocker switches?
In electronic devices, the Rocker Switch is the on/off switch that turns the main electrical supply on and off. It has a control on both ends that you will demand to activate. Moreover, The rocking motion of pressing the switch’s button derives the name “rocker switch.” Because it resembles a seesaw, this switch has another name: the seesaw switch.
Rocker switches can replace toggle switches with three prongs with the same SPST functionality. However, toggle switches and rocker switches have different builds. Toggle switches often use metal for their main components, while rocker switches choose plastic. To add insult to injury, the toggle switch is noisier than the rocker.
Lighted/illuminated rocker switches feature an integrated light that illuminates when turned on. Recognizing whether the button is on or off can be pretty helpful. Also, the toggle switches don’t have any built-in illumination. To highlight the “ON” state, illuminated switches use a tiny light source such as an LED, neon, or incandescent bulb.
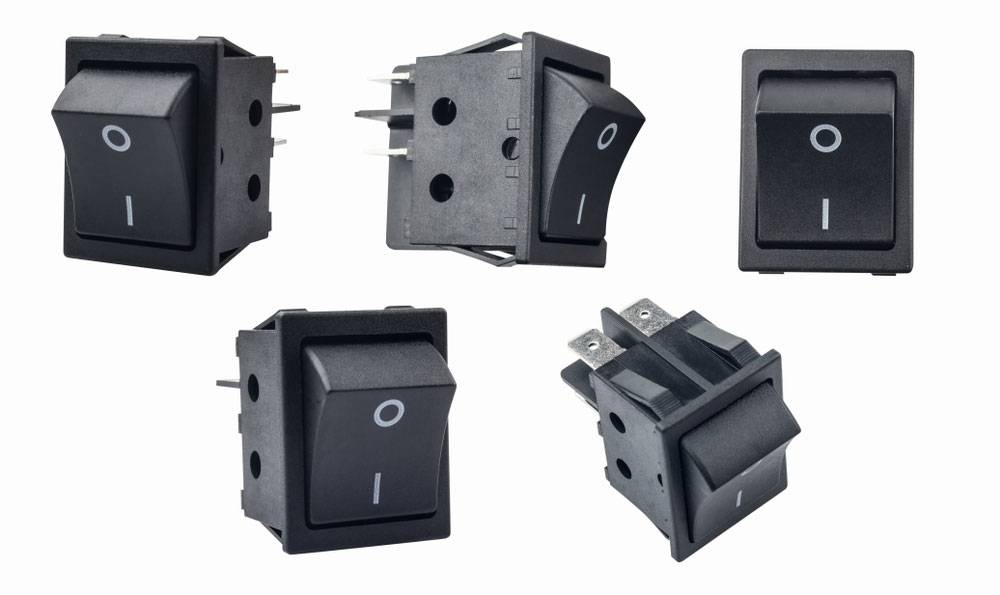
Caption: A typical Rocker Switch
Types of Rocker Switch
You can find the rocker switch in two types
- Single pole
- Double pole
A single pole rocker switch can handle only one button at a time. However, if you use a double pole switch, it can control two circuits simultaneously.
Types of illumination of Lighted/illuminated rocker switches
There are three types of illumination switches.
- Neon: High-voltage applications, such as those using 110 or 240VAC current or DC voltages greater than 90VDC, are better for neon lamps. Also, a 240-volt neon-lit rocker switch is standard in applications that operate on mains electricity.
- Fluorescent: For lower AC/DC voltages, consider fluorescent lights, which use gas bulbs.
- LED: LED lights have an extended lifespan, use less electricity, and produce more light than traditional bulbs. However, they do cost more than standard light bulbs or neon lights.
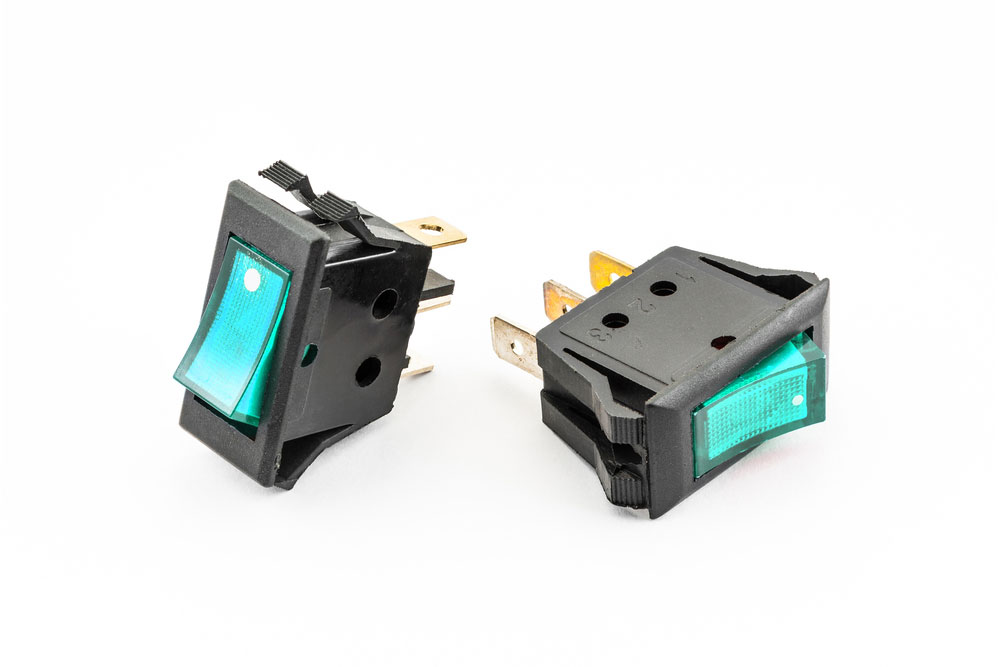
Lighted/illuminated rocker switches
How to Choose a Rocker switch: AC or DC Circuit?
When choosing a switch for your project, you should consider using it in a DC or AC circuit. As you know, buttons allow or stop the flow of electricity in a course. When you break a circuit, an arc or spark is made between the contacts of the switch. Thus, if you are using Alternating or direct current, it affects how fast this connection breaks.
The size and direction of an alternating current change. Moreover, the voltage flips back and forth as the direction changes, making “current zeros” twice per cycle. The arc goes out quickly when there is no current in an AC circuit. DC keeps the flow of electricity steady and in one direction, so it takes longer to put out these arcs. Hence, over time, it can destroy the contacts of the switch by overheating them.
So, if you need a lighted switch for a system that runs on electricity from an alternate source, you must choose a rocker switch that can handle 240VAC. Moreover, a 12 or 24 VDC rocker switch is better for low-voltage applications that are likely to be powered by batteries.
Rocker Switch Terminals
Before knowing how to wire a rocker switch, you had better know its terminals first.
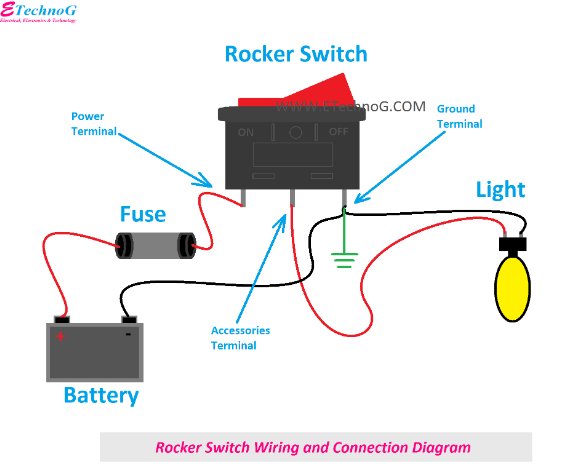
Power Terminal
Power terminal on the left side of the lighted rocker switch. For the most part, this terminal is used to connect the power source’s positive terminal. As such, it can draw electricity from the grid.
Accessories Terminal
“Accessories” terminal in the middle of the illuminated switch. The linked devices or loads receive electricity from it. You have to attach this accessory terminal to the positive terminal of the load.
Ground
“Ground” is the terminal on the right side of the lighted switch. Moreover, you must attach the ground terminal to the opposing ends of the power supply and the load. Remember, the pin should be grounded, too.
The names of the most common switches are “Power,” “ACC,” and “Ground.” As you flip the button, the circuit between “Power” and “ACC” opens and shuts. The light won’t function unless “Ground” connects to the vehicle’s ground. Hence, you’ll have to use a multimeter or learn through error and trial which connections go where if they do not have labels. Keep in mind that if a switch is connected to the accessory’s ground terminal, it will not turn the device on.

Caption: Rocker Switch Terminals
Source: https://www.etechnog.com/
Rocker Switch Wiring and Connection Diagram
One common type of rocker switch is a “single position, single throw” switch. You cannot create any connection when the button is in its “open” state. When in its opposite, “closed” configuration, the power supply to the attachment activates.
How to Wire a Rocker Switch: 3 Pin Rocker Switch Wiring
To connect a 3-pin rocker switch, you will follow these steps.
- Cut the ground wires long enough to reach the destination. One wire is supposed to connect the power source to the ground connection of the switch. In comparison, the other wire should connect the battery with light.
- Now, cut the power wires to length. Again, you will need two wires. One wire is for the battery to “acc” connection of the switch, and the other is for the light to power connection of the controller.
- Remove half-inch insulation from the ends of each wire.
- Attach the first power wire to the switch’s power terminal and the light’s terminal. Connect the second power wire to the battery from the “acc” switch.
- In the end, connect the ground wire from the “and” light terminal to the switch’s ground connection. Also, attach the other “and” wire from the button to the battery ground terminal.
Caption: 3-pin rocker switch wiring diagram
Source: https://www.etechnog.com/
How to Wire a Rocker Switch: 5 Pin Rocker Switch Wiring
The 5-pin rocker switch connection has 2 extra legs to support a stable relationship. To wire it with a light, you need to follow these steps.
- Identify the place where you will fix the switch. Take the negative and positive wires from the light to the controller.
- Attach the wire from the battery to the switch. Experts recommend adding an in-line fuse to the connection.
- Take a black wire. Crimp one end from battery negative wire and the other with a female connector. Also, do the same with red electrical wire.
- Connect the wire to terminal 6 and attach the wires to terminal 2. Also, run the negative crimped wire from the light to the battery pack.
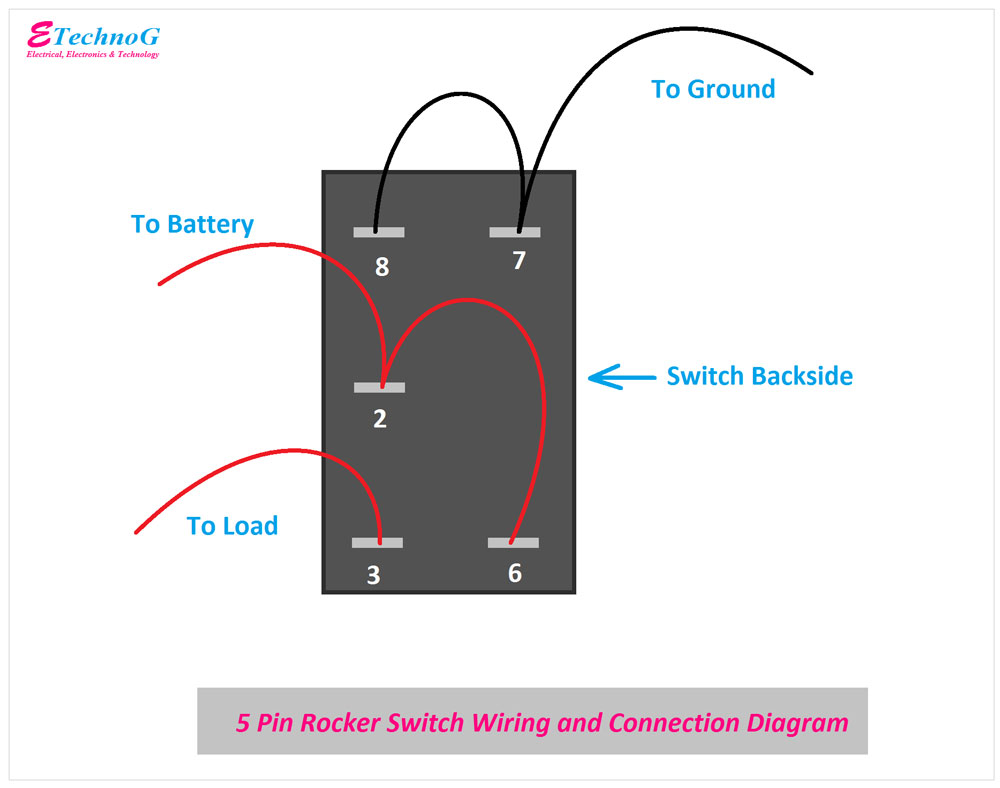
Caption: 5-pin rocker switch wiring diagram
Source: https://www.etechnog.com/
Note the above is just an illustration of how the switch works. A fuse should usually be included, and a relay utilized in higher amperage applications.
Conclusion
Lighted Rocker switches are a part of many light circuits. However, the current passing through the circuit affects the circuit’s behavior. Here at Cloom, we offer wiring harnesses and cable assemblies to make you safer and more reliable. Also, you can find these switches in two variations, the 3-pin and 5-pin.