
Do I Need An Ethernet Cable For WiFi? The internet has proven essential in today’s world, with more and more daily tasks requiring the use of the internet.
In the past, you had to take turns sharing the home computer as it was the only device that could connect to the internet.
However, today almost every electronic device can connect to the internet wirelessly thanks to the introduction of wireless routers. With that in mind, do I need an ethernet cable for WiFi?
The article below will help answer your question.
Table of Contents
- Flexibility: WiFi Wins Hands Down
- How To Set Up A WiFi Network
- Do I Need An Ethernet Cable For WiFi
- Conclusion
Flexibility: WiFi Wins Hands Down
WiFi’s greatest advantage is flexibility; once you enter the network’s password, you remain connected as long as you are in range.
Therefore, it is the perfect choice for portable devices such as laptops, tablets, and phones. Even if you are an inexperienced user, you can easily find the WiFi network you want to join and enter the password.
Regarding portability, ethernet referring to a wired connection is not the best option. It doesn’t make sense to plug in and unplug your device when you need to move across different rooms.
Ethernet works best for stationary devices such as a home computer because you rarely need to move it.
Also, if you are a fan of smart home technology, you will need to use WiFi.
Smart home appliances such as cameras, doorbells, and light bulbs need to stay connected to a network, and what better way to do so than using WiFi?

Ethernet refers to a wired connection.
How To Set Up A WiFi Network
Once you get a broadband (high-speed) internet service for your home, it is not that difficult to create your wireless network.
WiFi will allow you to connect smartphones, laptops, and other devices to your home network without ethernet cables. Follow the steps below to help you set up your WiFi network.
Purchase a Wireless Router
The first step in setting up your wireless network is buying a wireless router that will enable you to broadcast the signal from your internet modem across your house.
Some ISPs (Internet Service Providers) might offer the wireless router for a monthly fee; therefore, if you don’t have prior experience setting up a wireless network, this could be the easiest option for you.
Also, sometimes modems are designed with inbuilt wireless routers; therefore, you don’t need a wireless router.
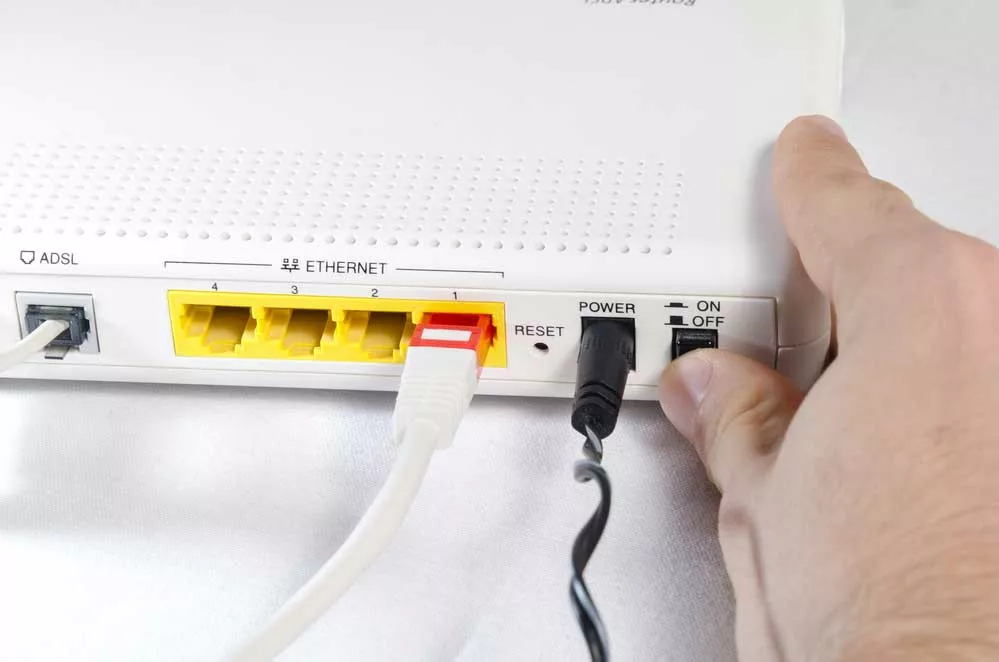
Connect The Cables
- After you have bought your wireless router, you will have to connect it to the existing internet modem.
- Connect an ethernet cable from your wireless router to the internet modem. Usually, a short ethernet cable is provided alongside the purchase of your wireless router.
- Plug in the power cable for your wireless router.
- Give it at least one minute to power on and confirm if all the lights on the wireless router are working correctly.
Configure Your Router
The next step is configuring your wireless router’s default settings using a computer. This entails choosing a unique network name and setting the password for your WiFi network. Follow the instructions below to help you with this step.
- Using a web browser, type your router’s default IP address into the address bar and search. If you are not sure of your default IP address, you can refer to the router’s instructions manual for the necessary information. However, some of the most common default IP addresses include 192.168.2.1, 192.168.1.1, and 192.168.0.1.
- After entering the default IP address you will be brought to the router’s sign-in page. Once more, the correct sign-in details are probably included in the router’s manual. However, most wireless routers use the standard username and password combination for example admin and password.
- Once you sign in the screen will display the router’s settings page where you’ll need to locate the network’s name setting and choose your own unique network name.
- Next, find the network’s security settings and select an encryption method. There are a variety of encryption methods you can pick from but it’s best to choose WPA2 because it’s considered the most secure encryption method.
- Set your desired wireless network security passcode. Ensure to choose a strong passcode to prevent others from gaining access to your network.
- Remember to save all your changes by clicking the save button.
Connect!
You are now finally ready to connect to your wireless network and ensure it’s working. Depending on the type of device or computer you are using the process of connecting to a WiFi network may differ however most systems will need you to follow the steps below.
- Go to your computer’s network settings and search for nearby wireless networks.
- Select your network and enter the passcode.
- If the connection is successful, open a browser and search any web page to ensure the page loads and opens meaning your WiFi network is properly functioning.
Caption: set up a wifi connection
Do I Need An Ethernet Cable For WiFi
Older versions of WiFi routers normally need an ethernet cable to connect to an internet modem. Normally the cable is provided by the Internet Service Provider.
Therefore, even if all your devices can access the internet wirelessly you will still need an ethernet cable to access the network.
This isn’t always the case with some modern wireless routers functioning entirely wireless.
As mentioned earlier there are wireless routers designed with built-in modems to allow wireless communication with your devices, thus eliminating the need for ethernet cables.

Caption: Ethernet Cable
Conclusion
There you have it; routers that need to be connected to the modem to gain access to the network will always need an ethernet cable. If you encounter any problems or have any queries feel free to contact Cloom Tech.