
Wires are usually made of metal, making it easier for them to carry electricity. You also usually see an insulating cover protecting people from electrocution. For electrical connections, you need to make wire leads. However, the preparation requires expertise, and thus, you will need to practice. Let’s dig into the details.
Table of Contents
- What are Wire Leads?
- How to Strip for Wire Leads?
- How to Tin Stranded Electrical Wire for a wire lead?
- When to Tin and Not Tin Wires
- Wire lead assemblies at Cloom
- Conclusion
What are Wire Leads?
Insulation is present on nearly all electrical conductors, including wire and cable. However, you need to remove the insulating layer from the wire while making electrical connections. You need further heat or dip the wires if additional processing is required. As a result, you will get a Wire Lead.
Overall, wire leads can be wire ends stripped and terminated, insulation retained, or simply tinned.
How to Strip for Wire Leads?
Wire strip is a part of almost every electrical project that needs to be done. It means taking off the outer insulating layer while carefully not cutting the parts underneath. Wire stripping is not as hard as you might think, and thus, you can strip most cables with just a sharp knife. But if you need to get the job done quickly and accurately, it’s best to use the right wire stripping tools.
Determine the Wire Gauge and Type
Find out how thick is the copper wire that you will strip. Take the NM cable (nonmetallic sheathed cable), for example; in the number 12/2, the first is the wire gage. Also, pay attention to whether the copper wire has strands of conductor or a solid one.
Match the Wire to the Tool
Compare the wire gauge to the hole on the cable stripper that says the same thing. This step is very important. If you choose the spot, which is too large, it won’t cut the insulation all the way through, and it will be hard to get it off. On the other hand, when you choose an opening that is too narrow, the wire could get nicked or even break.
Open the Wire Stripper and Seat the Wire
Open the handles of the wire stripper. Set the wire in the right hole on one side. Then, press the handlebars together slowly until you can’t go further. Thus, you will cut the insulating cover of the wire.
Twist the Tool (if Needed)
If the insulation on the wire is not cut correctly, you have to rotate the wire inside the hole. You can also turn the tool if that’s easier. A little twist will be enough to separate the wire insulation.
Strip the Insulation
Now that you have cut the insulation, slightly pull the stripper towards the end of the wire. Also, you can push the wire using the thumb holding the wire to the tool.
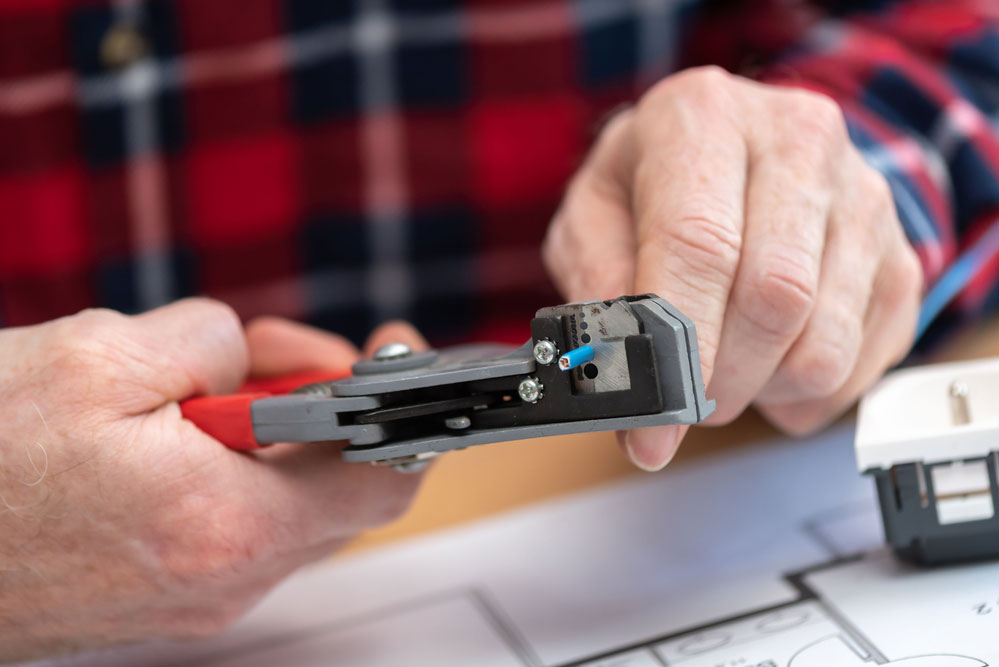
Caption: Electrician stripping a wire
How to Tin Stranded Electrical Wire for a wire lead?
As mentioned above, sometimes you need to tin the wire end for an electrical connection. You will use the melting solder around a stranded electric wire with a soldering iron in the tinning.
For tinning a wire, you need to follow these simple steps.
Prepare the Wire
First, you must prepare the wire as bare wires adhere to the tinning properly. If the wire has insulation, use wire strippers to remove approximately 3/4 to 1 inch from the end of the wire. These measurements give you a wire to tie around the screw terminals. However, it is not enough that you’ll have an extra wire sticking out.
Prepare the Soldering Iron
Plug the soldering iron in, turn it on, and let it heat up. Use a damp sponge to clean the tip of the soldering iron quickly. Also, it removes any rust that might have formed as the iron was getting hot.
Apply Solder to the Wire
In a straight line, pull the solder off the reel. Use a “third hand” tool or heat-resistant holding mechanism to secure the wire if desired.
To generate a small pool of solder liquid on the iron’s tip, touch the solder’s tip to the end of the soldering iron. It will aid in the wire’s ability to conduct heat. As the last step, apply a small amount of solder to one end of a wire, ensuring that the soldering pool is in touch with it.
Sold the wire on the top side, the side facing away from the tip of the soldering iron. Also, it would help if you dragged the wire strands into the solder, which should melt and solidify. Using the soldering iron and the soldering iron together, melt the solder on the wire as you go. Keep the soldering pool from growing too thick while tinning a piece of wire, especially if you’re using flux.
Let the Wire Cool
Look at the results once the solder cools. The solder should not form a lump or thick bead, generating electrical resistance, and should be thin all around the wire. Under the solder, the wire fibers are usually visible.
After heating the wire, you may wipe it off with a damp cloth if there is any excess solder. Bend the wire into a candy-cane shape with needle-nose pliers if you want to attach it to switches and receptacles easily.
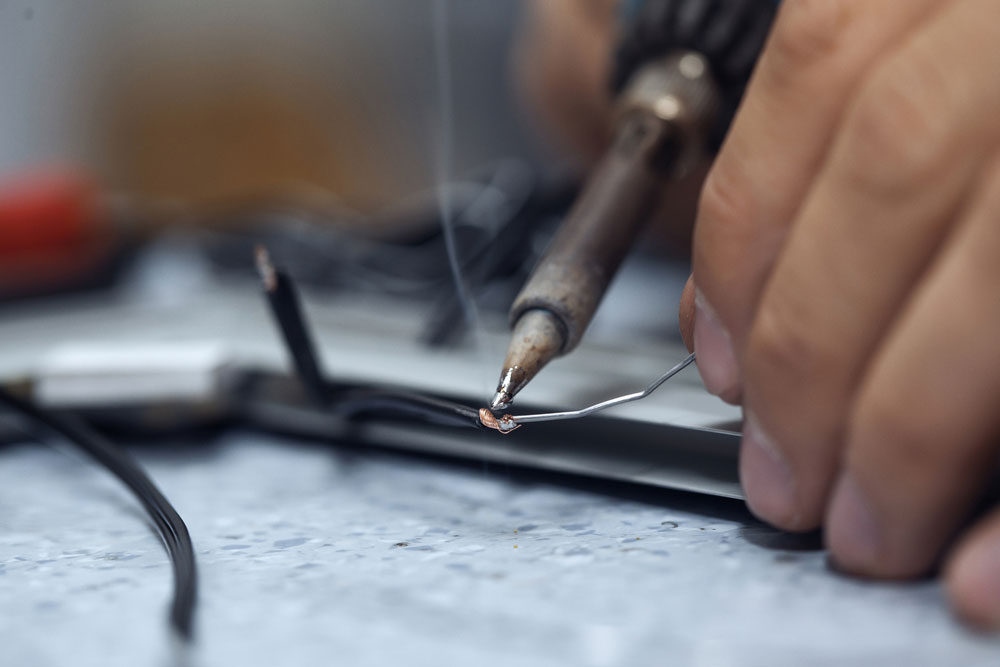
Caption: Soldering wires
When to Tin and Not Tin Wires
Most people use the method of tinning the wires before soldering, as it is a common way to keep fine wires together. Also, it makes the process easier to attach the cable to connectors and screw terminals. Thus, it makes sure that all the wires are connected.
According to the IPC 620 standard, you will tin the stranded wires when you use them in
- Crimp termination
- Forming Mesh Splices
- Threaded Fasteners
Therefore, you should consider not tinning the stranded wires. The reason behind this argument is that as you screw the wire, it will break the joint of the solder. As the joining breaks, the strands will loosen up due to opening. These loose wires are susceptible to vibration, corrosion, and breakage. Hence, not tinning the wires will give you a better gas joint.
Wire lead assemblies at Cloom
Our customers are our priority, and thus, we ensure to give you the products that match your exact design requirements. Most of the time, the single-wire, dual-wire, and multiple-wire lead assemblies work our best for signal and power applications. Our value-added services include,
- Wires cut to length for your electrical circuit
- Partial or full striping from left and right
- Multi-step and multi-layer stripping
- Processing of multi-layer shielding cables
- Jacket stripping of thin insulators and multi-conductor cables
- Jacket and inner stripping of conductor
- Multi-step jacket stripping with window slitting and inner conductor stripping.
Remember, these services are available for many wires, including the largest 2/0 to the smallest 32 AWG wire. By choosing Cloom, you will
- Get rid of manually processing your wires in your workplace, leaving the workforce available for other chores.
- Get more floor space for other projects
- Deliver precise wiring with great results
- Lessen the possibility of Human error (since all our processes are fully automated)
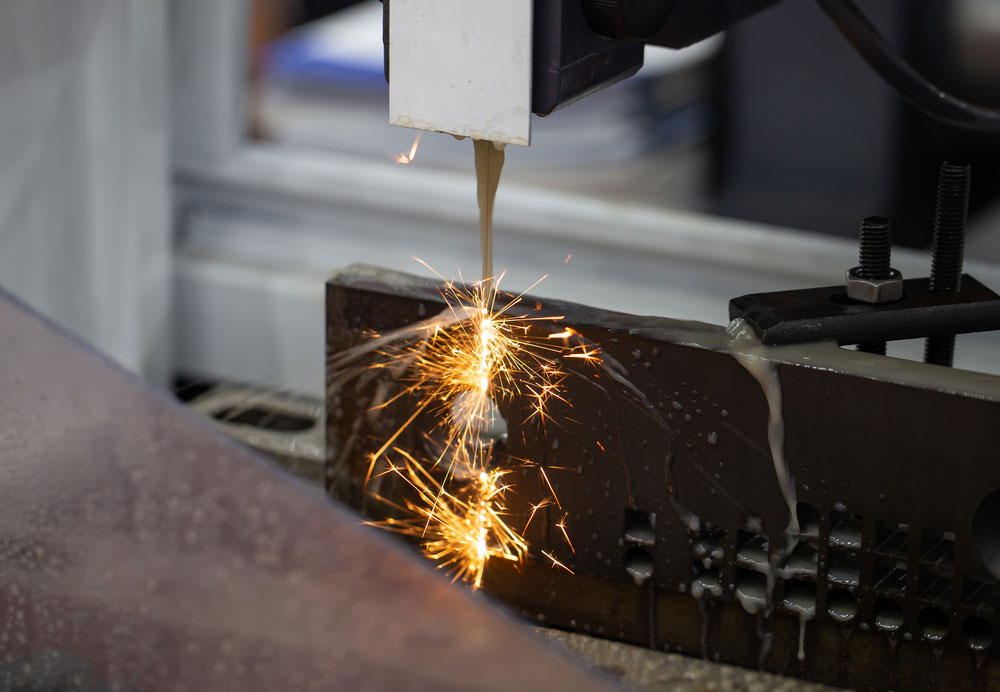
Caption: Wire cutting with the machine
Conclusion
Want a good wire lead for your connection? Cloom uses computer-controlled, automated equipment for all wire-processing services that eliminate quality concerns. Cutting and stripping machinery, for example, eliminates damaged conductors that result from hand processing and are ignored by the inexperienced eye. Without causing any damage to the insulation or conductors, our high-quality equipment processes the wire swiftly and precisely. So, contact us now and get a free quote on your project wiring need.